DEPARTMENTS

Friday, October 30, 2009

Cleaning House 2 - 28mm Pulp Figures

So, the islanders went quickly, which was cool. I am now turning toward clearing out my Pulp Adventure figures. This collection includes everything from a ton of gangsters. adventurers, Chinese Bandits, as well as others. I've posted the list over at Rattrap's Forum, so if you are interested, check it out here - http://www.rattrapproductions.com/speakeasy/viewtopic.php?t=2055&highlight=

-Eli

Tuesday, October 27, 2009

Cleaning House

So, I have been taking stock of my various miniatures assets and have come to the conclusion that I am pretty much done with 28mm for the most part - at least for now. To this end I am planning on selling or trading off as much as I can. I am hoping to be able to roll old stuff over for new (to me) 15mm assets for my various Colonial, Back of Beyond, and Sci-fi projects.

What is it I am planning to get rid of? Mainly I am going to clear our my Pulp Adventure and Fantasy Stuff. Don't worry, I'm not trying to turn this blog into a business or anything but I figured I would mention it here first, so as to allow fellow hobbyists, followers, and friends first crack at stuff.

The first thing I think I'll try to get rid of are the Cargo Cultist conversions that I did some time ago. If you are interested feel free to email me off the blog (email in my profile). We can discuss price or trades in private and not clutter the blog with such "filthy" business.

Thanks for taking na interest,

-Eli

Thursday, October 22, 2009

Blog Find - Mad About Gaming


Howdy all,

Thought it was time to pimp another fine blog that I found someplac out there (where do we usually find these?). The blog is called Mad About Gaming, and judging by the author Dave's insane tables. What stuck me about this blg is the wonderfully expansive 15mm gaming tables that Dave has built FROM SCRATCH. Block upon block of Middle Eastern style buildings, lush natural terrain pieces and even sme handy WIP and how-to posts. Check out his quick way of doing his buildings.

Good stuff Dave,

-Eli

15mm Shanty Town Terrain WIP - Roofs

One of the more artistic and challenging parts of the shanty construction was the roofs. Because I wanted them to be removable but stable, I had to find a way to make them stable but still look ramshackle. This took some trial and error but I eventually found a few ways that worked and refined the process. Both methods revolve around a central piece of bass wood cut to the general shape of the shanty itself.

Photobucket  Photobucket
The roof shown above shws the method I went with for most of the shanties. It begins with the central piece of bass wood, in this case cut smaller to conserv on materials but there is no reason it could be cut to the dimensions of the outside wall (actually slightly smaller) for a better fit. From the center, I glued several precut pieces of corrugated paper and thin card at right angle from the central foundation piece. Effort was made to overlap at the seams as much as possible.

One end was given pieces that protruded farther out so they would provide a bi of an overhang in front of the building, but this was mre of a stylization for this larger shanty. Most of the shanties only had a single piece sticking out directly over the door.

To finish off the lok of the roof, I added a couple of pieces diagnoly at the back corners to fill the gaps in the rofe left by the right angled pieces. Several other pieces of corrugated material where placed to break up the even seams and to cover gaps between the planks, making the roof more "weather resistent". I found that placing some of them at odd angles and including smaller panels made it look more "lived in". Some thin off-cuts of bass wood were layed over the top to represent plants nailed ver the roof to keep them from blowing away. Balsa or plastic sprue could also be usd as long as it looks like boards.

I may add some piecs of cloth or even plastic bag from the little mini bags that my miniatures are shipped in to create an even mre ramshackle, patch job look. I'm sure we've all seen old blue pastic tarp, landshaping or weatherproofing sheet nailed onto rofs to patch leaks.

So, that is roofs.

Take care,

-Eli

Thursday, October 15, 2009

15mm Shanty Town Terrain WIP

Shanty Streets

I have started building some cheap and dirty shanty buildings for use with my 15mm miniatures gaming. Originally spawned from a discussin of post-appocalyptic terrain on TMP, I have recently come to realize that this a versatile terrain piece that can be used for modern warfare games, post-appoc, and even scifi games. It has taken me a bit to get started on this project, but I finally managed to get ahold of some supplies and set to work three days ago while at work.

The basic materials for the projec is a relatively stiff, corrugated paper used for scrapbooking. This comes in sheets about 12"x12" and in a variety of colors, though the color has little to do with the project as it's going to end up painted. I suppse the color could help if you were able to find some that had a sort of old metal color. Below is a swatch of the paper I used.

Photobucket

As I mentioned before, this was a quick and dirty project which means I flew into it with minimal planning, readily available materials and a lot of faith in my abilities. T maintain the ramshackle appearance, I tried to use as few large single pieces as pssible when creating the walls. Once I had done a few, I came up with a system of making a frame cut from thick card, though in the future I'll likely used something stiffer. This frame is the top of the structure.

Photobucket

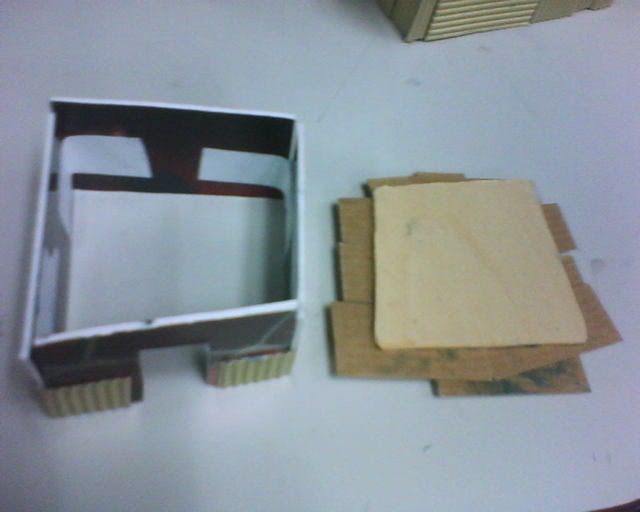
The walls were constructed by gluing combinations of various pieces of corrugated card, thick card and whatever scraps of this and that I had on hand. I did not have to much in the way of alternate materials at work, s most of these first shanties are pretty much entirely made of corrugated materials. Windows and doors were done by leaving gaps between construction pieces as ften as possible and avoiding cut-outs. I also tried to leave overlaps and uneven assembly to create more of a rickety feel. All of this was done using an office glue stick, though I may go back and reinforce some of the glue work with hot glue or schol glue where needed.

I'll keep it short for now and will post more on how I did roofs tomorrow.

Hope you enjoyed!

-Eli

Wednesday, October 7, 2009

Imperial Ships From ZandrisIV

I have been eyeballing ZandrisIV miniatures for ages. Andre has always brought out a quality design and his Homeworld-inspired range of ships had always been a draw for me, but their latest release has thrown a bright shiny grail into the air in front of me and checked off a big box on my wish list.

I speak of their new Imperial fleet. Designed as a side project from the rest of his other fleet projects, Andre has drawn from the cult classic anime series known popularly as "Legend of Galactic Heroes". The pictures below are from his site and show unpainted versions of the ships


PhotobucketPhotobucket


The first picture shown shows the GHI0002 - Imperial Cruiser (sold 2 to a pack). The model is 34mm long, which seems small for a cruiser until you realize these are sculpted at 1/15000 scale - the ships in LOGH are huge. The miniature captures all the aesthetics of the Imperial vessels - the clean lines, the center vein that seprate the top and bottom of the hull, the drum like fixtures just before the engine sections at the rear.

He has also released the GHI0001 - Imperial Battleship (also 2 to a pack). As you can see it maintains a consistent theme and style to the cruiser but it is bigger, measuring in at 43mm. Also a superb-looking model. 

I had a chance to chat with Andre via email today and there are plans to expand this line, but once again, it's more of a side project to his regular line. This is fine, these ships have been worth waiting for and I'll be getting my order out to him ASAP.

For those of you who are not familiar Legend of Galactic Heroes, I've posted a few pictures of ships from the series that I've found online, so you can see that he has done the setting justice. These pictures show original line art from the Japanese publications. I think you'll agree that Andre at ZandrisIV has done them justice.

Photobucket Photobucket 
Take care!

 Eli


Tuesday, October 6, 2009

MEC Troops Spotted

I have been talking about my Manchurian Economic Combine (MEC) for some time now and just thought I'd post a quick post to show off some of the paint work I've been doing on them. Unfortunately, they are a bit dark, but as far as WIP pics go, they could be worse.

PhotobucketPhotobucketPhotobucket

The overall design uses a Valejo Dark Camo Green over a black base coat. A made an attempt to add a bit of variety by using some Brown and a sort of Dark Yellow color from my craft paint supply for camo. I first painted on irregular Brown splotches and then slashed in some yellow streak and plotches over that. This created an almost sort of tiger stripe effect. The camouflage was mostly kept to the arms and legs with the main body being kept the basic green. This gives a look of a monochrome vest over fatigues look. For accents, I kept the boots and guns black but painted some of the magazines on the guns in a medium green.

Overall, they look okay and will stand up on the table defined from other forces. The figures used are Peter Pig Iraeli figs found in their AK-47 line. This gives them a down to earth mid-tech look. They are armed with Galil assault rifles which are not immediately recognizable as any other popular assault rifle.

Enjoy!

-Eli

Saturday, October 3, 2009

The Isle of Doctor Necreaux


Last night at our weekly Game Night, I was introduced to a fun little card game called "The Ilse of Dr Necreaux". We played it once and I have to say it's really fun. It's an odd sort of card game in that it's a cooperative play game, with each player playing a member of the team.

At the beginning of the game you construct a character by selecting three character traits from randomly drawn cards. Using these abilities, you and your team go on a fast-paced race through the lair of Dr Necreaux, battling monsters, traps and looking for equipment and the key elements to win the game.

The game play here was described to me and very much resembled "Munchkin" but with the players all working together instead of against one another. The key difference to this game and others I've played is that it's all based on timing your pace through the lair. You set your speed and that determines how fast you go through the lair, but it also determines how many encounters you face before your next rest.

All in all the game was fun and showed potential. A big bonus was the art style of the cards which was a sort of nod to the likes of Flash Gordon and Buck Rogers. I found a lot of inspiring ideas that could be used in miniatures if I ever get back around to doing 28mm pulp sci-fi again.

Thanks for reading,

-Eli
Related Posts Plugin for WordPress, Blogger...