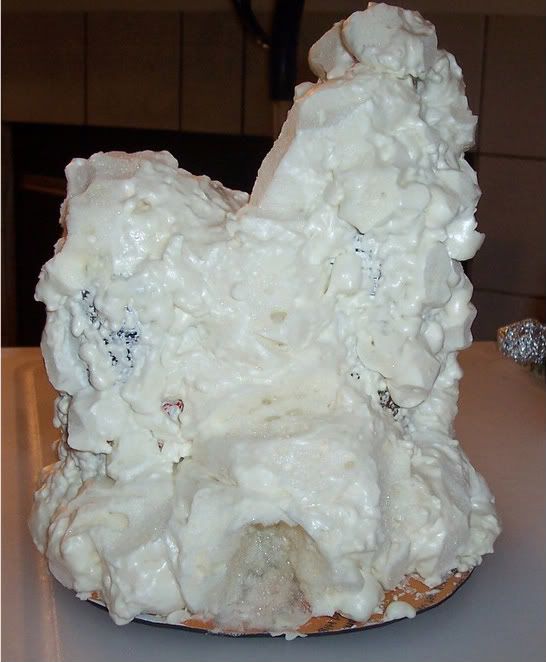
For some time now, I have been wanting to try a project using expanding foam, but never really seemed to get around to it. I finally went out the other day and bought some cans of expanding foam insulation filler. There are three stages but I only picked up the heavy and light expanding kind figuring I'd use one for bulkier projects. Never having used the stuff before, I thought I knew what I was doing.
WRONG!
The original idea was to do something akin to a giant termite mound - something usable for alien bug people or giant insects. I cut out a oblong base out of some flexible plastic I had, figuring this flexibility would allow me to counter any warping caused by the foam as I didn't have any hard board or anything around. I glued a plastic bottle and a soda can to the base to provide a basic structure and then went to spraying.
My first mistake was under-estimating how much the "light" expansion foam was going to expand. Think I knew how much it was going to expand, I had put on a couple of layers of the stuff and ended up with a BIG mess. The foam expanding and bulged in places and seriously warped the base I had put it on and made the whole thing look like a prop for a giant ice cream sundae. It looked like a flop.
As it was going to be used as gaming terrain, I wanted to make sure it had some playable surface on it. I cut away chunks of the foam, saving them for possible use later (the stuff's not cheap). I flattened out part of the top of the rock and made sure there was a place to stand about halfway up one side. Deciding it needed more gaming options and still wanting to make it some sort of monster "lair", I carved a cave entrance into it. Now it could be used for giant insects, orcs, morlocks, cavemen, prehistoric beasts, whatever.
Once I had it cut down and shaped to my satisfaction, I noticed a few places that seemed to bare of surface details. This is where the scraps came in and I glued a few of them to the bare patches and shaped those that needed it.
So, now I have this big, ugly foam rock and I guess the next step is to coat it with something and then get to painting it. Maybe I'll add a few shrubs and scrub to it to give it that aged look. We'll see.
-Eli


Great start! I tried using this stuff to fill some plastic containers, to give them more internal support. The results were spotty.
ReplyDeleteOn the other hand, I got some blister-looking bubbles from the overflow that I have an idea or two for.
Might I recommend a primer specifically for styrofoam? I found a can at Hobby Lobby that I used on some styro - its for the open cell kind often used with floral products. It might not melt the foam so much.
I plan to use a thinned out spackle and grit coating before proceding. This should add some rigidity to the texture as well as add to the stoney appearance.
ReplyDeleteThis has given me a few ideas for a large terrain piece I've been thinking about. I look forward to seeing how you go about painting it.
ReplyDeleteThat's cool. Glad to have inspired. I am currently working out a plan to make the formation look lees "round". As the thing is based on a roughly circular base, I am considering adding some more boulders made of other more foamr or even pine bark to lengthen the rock formation a bit.
ReplyDeleteAs for painting, I think it's going to need a coat of spackle first.
LOL, Man you should have consulted with me before breaking out the expanding foam. I used to work construction and can tell you some horror stories of expanding foam.
ReplyDeleteThat said I think you have a good start there for a project. Definately cover it with spackle as this will help fill in the cracks and air bubble holes.
Devon
Ya, turns out a buddy in my gaming group has used it too. I plan on spackling at least parts of it, but I also don't really like the vertical look of it, so I am planning on extending it out on one side so it has a bit more pf a horizontal characteristic as well.
ReplyDeleteThis means it'll be a bigger piece of scenery, but it won't look like it pops up out of nowhere.