 Hey all,
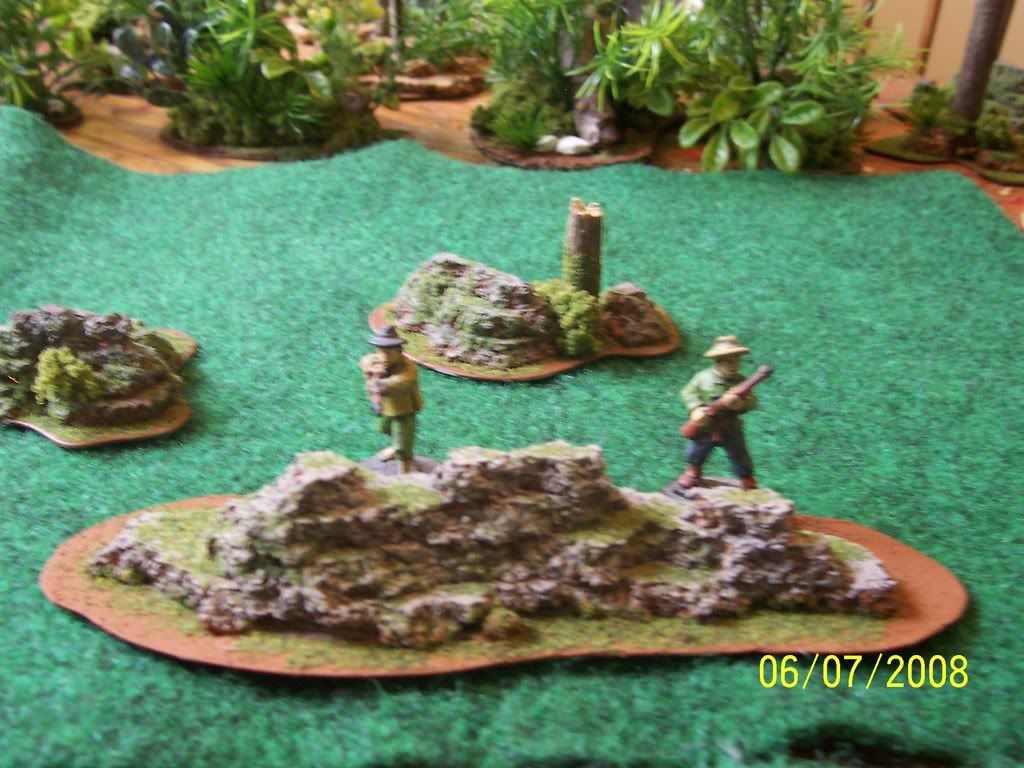
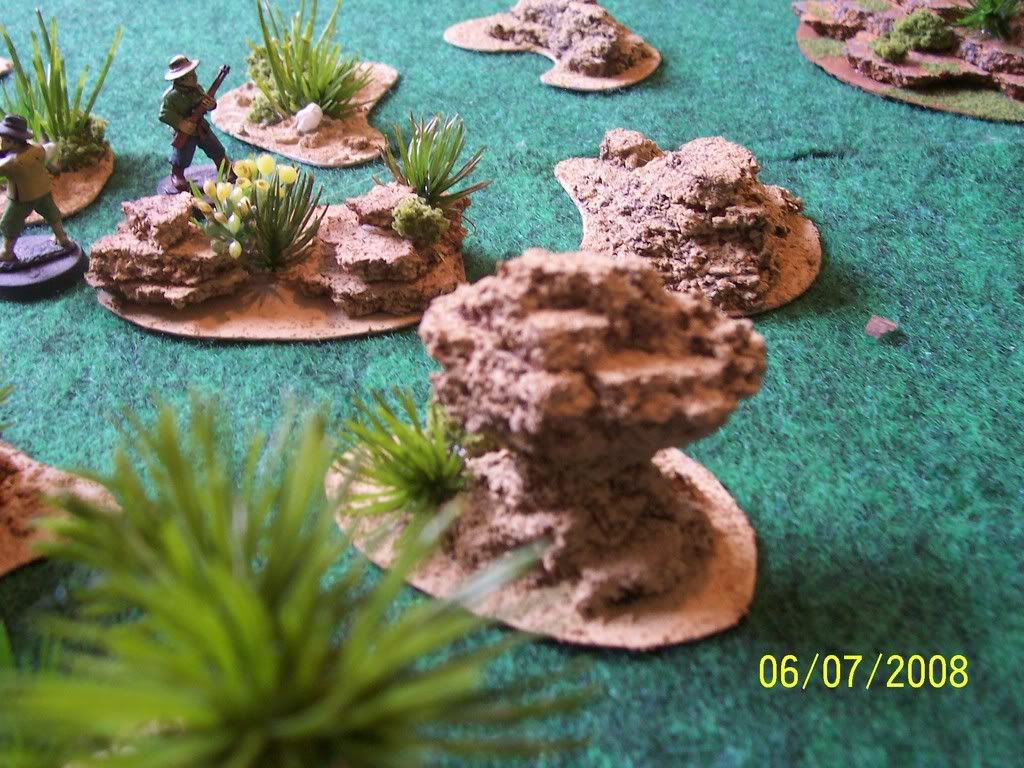
In my last post I mentioned that I had been working with cork board for making terrain of various sorts and I thought I would share one of the more effective but horribly simple projects that came out of this all. Rocky outcroppings.
These are really easy to make either as a part of a larger piece of terrain or as a stand-alone accent piece. They can make for good obstacles and hard cover for your wargames tables without having to resort to stone walls, hedges, or rubble.
Step One
To make these I began by either gathering the scrap from lager terrain projects like my forest stands or, in the case of some of the lager sections, tearing off some new ones. Make sure that you are collecting them in increasingly smaller sizes as they are going to come to a peak of sorts.
An important thing to mention at this point is that I find that tearing instead of cutting produces the best results when using cork in terrain. The rough edges and "organic" shapes formed in this way go a long way toward making the terrain look like you spent a lot of time on it, when you didn't.
Step Two
Once you have your pieces selected and/or shaped, find a suitable base. For most of my smaller bases I used extra island markers from "Pirates of the Spanish Maine" but you could easily cut some out of thin card. With my larger ones, the bases were made out of cut-to-shape spell cards from older editions of Warhammer.
Step Three
Begin gluing them with the largest piece first (for my projects, I use hot glue as I like the instant gratification and solid hold) and then layering them on with increasingly smaller pieces in a general shape that resembles a rocky outcropping. There are no hard-fast rules here, but make sure they don't look too organized or they won't look natural. If you have obvious gaps between your pieces of cork, don't worry. These will only add to the details in the finished product or can be smoothed away during the Step Four.
Step Four
After assembling the basic structure of the rock, you should have something that resembles a mini mountain with peaks, curves and layers of sloped and flat space. It is at this point you want to take a good look at your rock and decide what things don't work.
If you are looking for more of a jutting rock, you want to chip away or add more cork to reduce the flat spaces. If your rock is supposed to look more worn, then leaving in some flat spaces and softening out the "slope" of your creation are in order.
When shaping the rock, your thumb nail is about all the tool you will need. The cork with easily give in to your prying and you can get rid of unwanted overhangs and such at this point.

 \
\Step Five
Once you have the rock shaped, it's time for painting. This same technique for building can be used for making rocks for various terrain so your choice of colors will be determined by where you intend to set your rocks.
For rocks that are going to be used for wet climates such as forests, jungles, or even mountain slopes or open meadows, I start with a base coat of brown, dabbed on rather unceremoniously into all the nooks and crannies and across the flat spots of the cork. Don't worry about total covering, just get most of it. The cork's natural color works to your advantage here. I let this dry most of the way but not all of the way before moving on to the grey (or sand if doing desert stones).
For the grey of the stone, I mix some sand into a grey paint, I tend to use a lighter grey as it will pick up some color from the remaining damp brown undercoat that you will be painting over. Dab this paint all over, going with a more complete coat this time. The brown will mix into the grey in places adding an uneven, mottled effect that will add depth to the color with the sand adding texture.
The bases should be painted and texture in accordance to what sort of terrain you intend to use your rocks in. I painted mine a very basic brown with some sand and cork chips mixed in for texture. This gave a nice dirty ground effect
Once you have painted your rock bases let them dry most of the way, but check back on them frequently as drying times may vary and you don't want them to get all the way dry.
Step Six
When the rock bases are mostly dry but still have spits and streaks that are damp, sprinkle them with flocking (skip this for desert terrain). This will give the rocks the look of moss and lichen and the ground an uneven greening that will blend it in with green table matts. Moss tends to gather on and around a rock and so this will make for a nice natural appearance.
Extras
I though I might mention some extra little things you can do to make your rock stands more interesting and artsy. None of these ideas are necessary to making them look good but can make them look better.
I find that adding the occasional tree stump, shrub or fern to a few of the bases in the mix will add depth and variety to your collection of stones (I say collection because once you start making them, you will end up with plenty). I use sponge flocking for low shrubbery and as well as a selection of plastic flower arrangement foliage. I fine that little plastic spruce sprigs from plastic floral arrangement materials make for good ferns. The occasional fallen tree made from natural twigs and sticks is also a good accent.
My best suggestion is to look to see what you can find and decide for yourself on this. There is a lot of "learn as you go" on this too and you will find that your first few quickly pale in comparison to your later pieces.
I hope you have enjoyed this tutorial and that you will soon have many many quick and easy rocks littering your table.
Thanks for reading,
-Eli


Great work with the cork Eli!
ReplyDeleteAs for comments, I recommend 'word verification'.
Greg
wow thats amazing. :) i think you do well with balance of life and gaming :)
ReplyDelete